If you own an online business with your own domain name, you should most certainly never underestimate the power of an email address that ends with your domain name. It adds that extra professional look to your business and as such you ought to set one up.
Here’s how to setup a self-hosted email address, if your web hosting account comes with the AWESOME CPanel
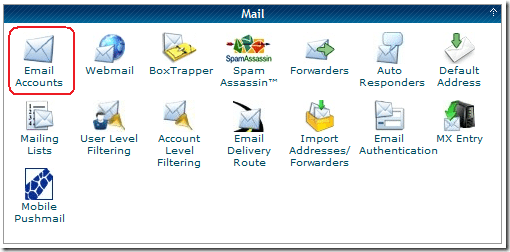
Log into your web hosting account’s CPanel then under the Mail section, click on Email Accounts.
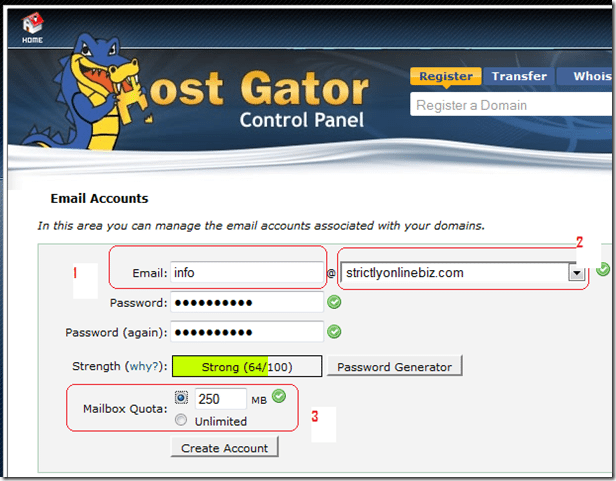
On the Email Accounts page, proceed as shown below
- Email: choose a prefix for your email address like admin, yourname or info.
- If you have multiple domain names or subdomain names, choose the one you want to create an email account for from the drop down list then enter and re-enter your preferred yet secure password for the email account.
- Set the quota for your email box: If left to unlimited, your new email account will be able to house as many emails as your hosting account disk space allows. I personally prefer using a quota and when that quota is up, I simply log in and delete some emails to create space.
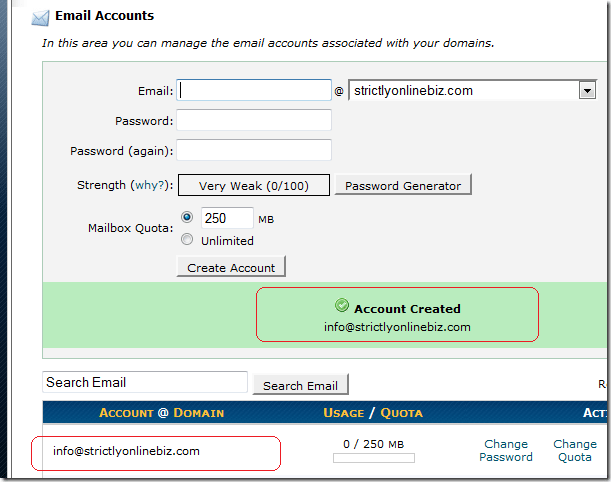
Hit the create account button to immediately create and activate your account and you’re done.
Checking your self-hosted email address can be a bit tedious as you’d have to log into your CPanel each time you want access to it. In a future post, I’ll be showing you how to configure your email client such as Windows Mail to be able to send and receive emails from your personal email account.
Hope this tutorial serves you well .
You’ll also like:
Please share this article to help others. Thanks


