Mac OS X by default doesn’t allow you to edit files on NTFS formatted drives be it an internal NTFS partition or an external USB flash/hard drive with NTFS format. While there are third party apps out there that can enable this function, they are somewhat of pricey thus my glee when last night I discovered that you could actually write to NTFS partitions on Mac OS X by just editing a simple file called fstab.
The process is quite simple and flawless but as always you’re advised to backup your Macbook before proceeding should in case something goes wrong and results in data loss.
NOTE: I did this on a Macbook Pro Retina with a fresh install of Mac OS Yosemite i.e the machine wasn’t upgraded from Mavericks to Yosemite. It was completely formatted with Yosemite. Also I did not try this on my Bootcamp partition as I wasn’t in the mood for surprises. I only did this on my 1TB and 2TB Western Digital external portable hard drives. Finally reboot your Macbook before performing this to avoid any unforeseen conflicts.
Step 1
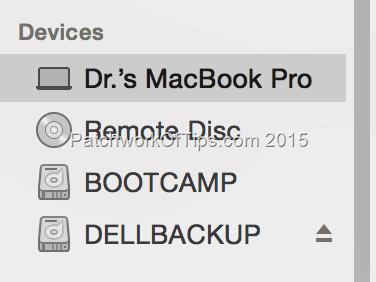
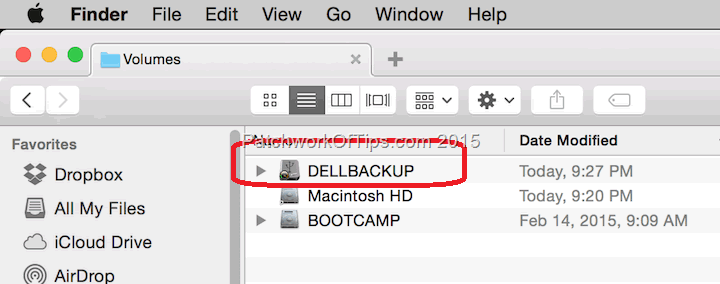
Make sure your external drive has a one word name. If it has two, you’d need to change it to one. I don’t know if putting an underscore in between words work. Plug your hard drive into the computer and confirm the name of the drive via Finder. In my case it’s DELLBACKUP.
Step 2
Launch Terminal and type in the following command
sudo nano /etc/fstab
You’ll be asked to provide your computer’s password after which the Fstab editor will open. Type in the following command making sure to change DRIVE_NAME to the name of your NTFS external hard drive or partition.
LABEL=DRIVE_NAME none ntfs rw,auto,nobrowse
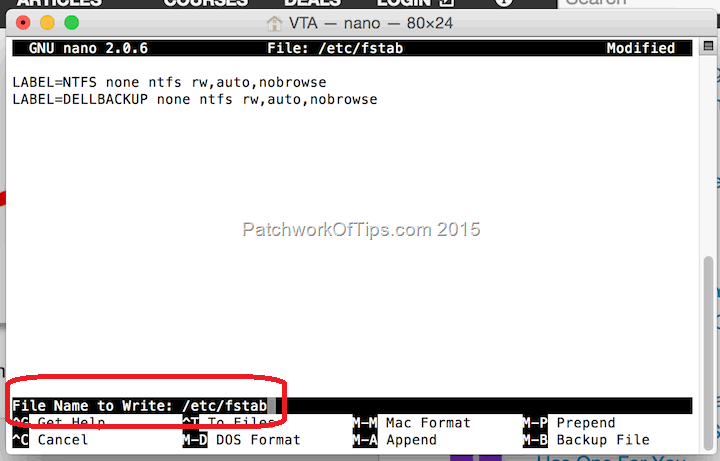
As shown below I have two NTFS drives configured already. The command for each drive you configure must be on a line of their own.
Press CTRL + O to save the fstab file and as circled below, you’ll see File Name to Write: /etc/fstab.
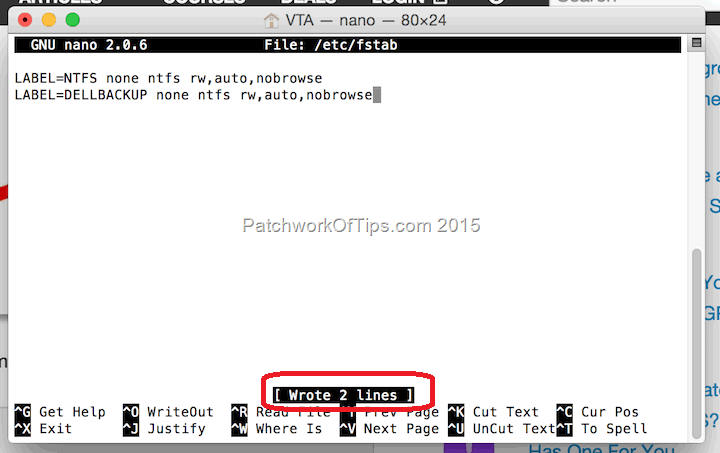
Press the ENTER key and this changes to Wrote 1 line depending on how many lines are contained in the file
Exit Fstab window by pressing CTRL + X
Step 3
Eject your hard drive safely and plug it back in. If you applied this hack to an NTFS partition on your Macbook, you would have to restart the Macbook. If everything worked, the first sign is that your external drive would no longer appear on the desktop or in Finder.
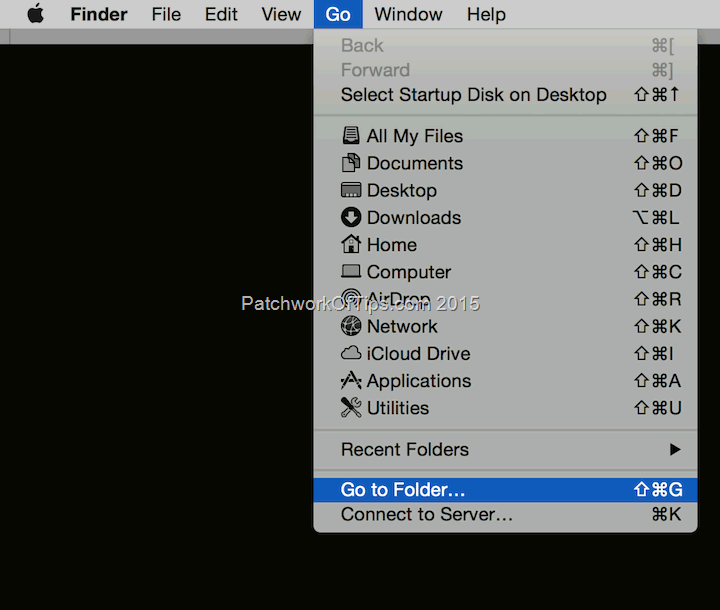
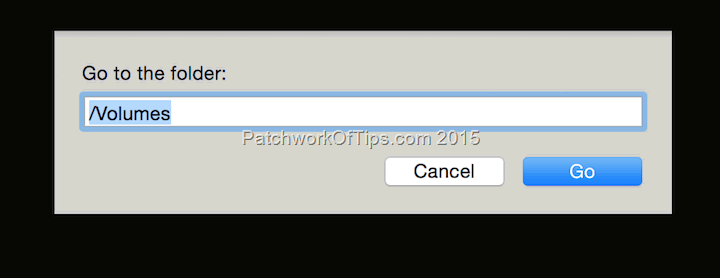
To access your external hard drive, go to Finder >> Go >> Go to Folder
Type in /Volumes
Your external hard drive should appear there.
Simply open it and start adding and deleting files as you wish.
I wonder why Apple keeps this disabled by default. It saves one a lot of time switching between Windows (Bootcamp) and Mac OS X. I’m still searching to see if there’s a way to have the drive icon appear in Finder and on the desktop. Going through Volumes might be a bit awkward sometimes but then again, the bucks this hack saves me is more important ;-).
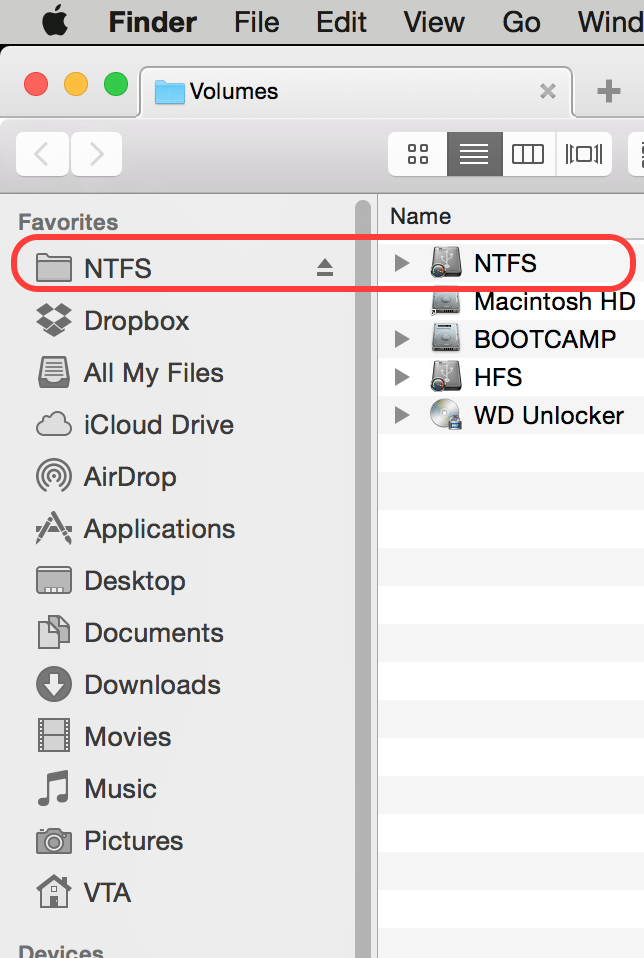
UPDATE 18th March 2015: Here’s how to easily access your drive without going to Volumes every time. Simply go to Volumes and drag the icon of your NTFS formatted drive to the sidebar under Favorites as shown in the image below.
When you eject the device, it disappears from Favorites and reappears whenever you plug the drive back into your Mac.
Thanks to one of you (Mr. X) for the tip ;-)
You’ll also like:
Please share this article to help others. Thanks
