I ended my romance with WP Super Cache last week after I discovered the cached files were getting automatically deleted for no reason. I had it setup to permanently serve cached files and not refresh the cache. The cache refreshing at random ruined it for me. As I wasn’t patient enough to wait for a plugin update to fix the issue, I jumped ship.
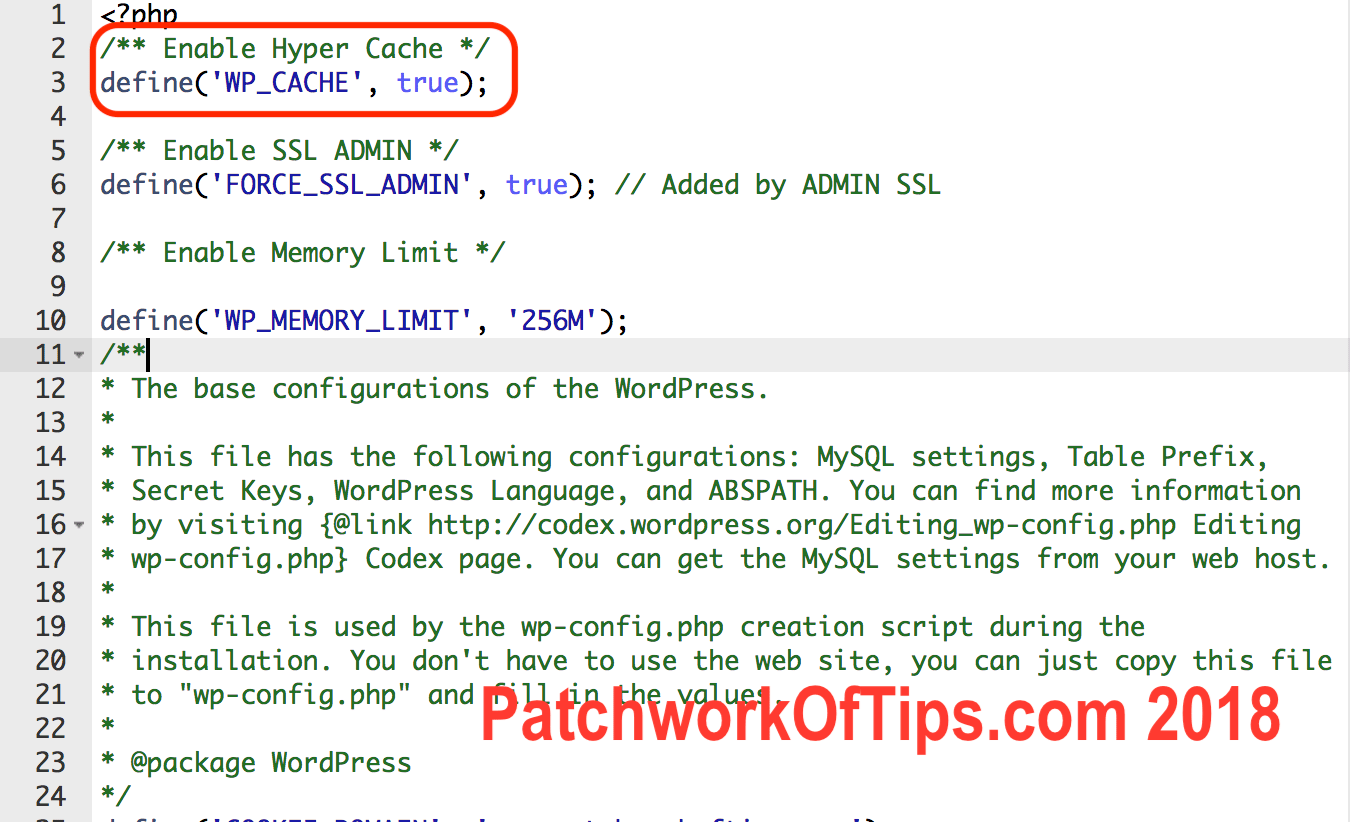
It’s been 3 days with Hyper Cache for WordPress and I love it so far most especially because it supports mobile themes. Now the major obstacle to setting up Hyper Cache is that you have to manually edit your wp-config.php file to enable caching.
Copy and paste the code below at the top of the file and you would have enabled caching.
define(‘WP_CACHE’, true);
NOTE: The above code might already be present in the wp-config file if your last cache plugin didn’t delete it after uninstallation.
Download, Install and Activate Hyper Cache then go to Settings >> Hyper Cache
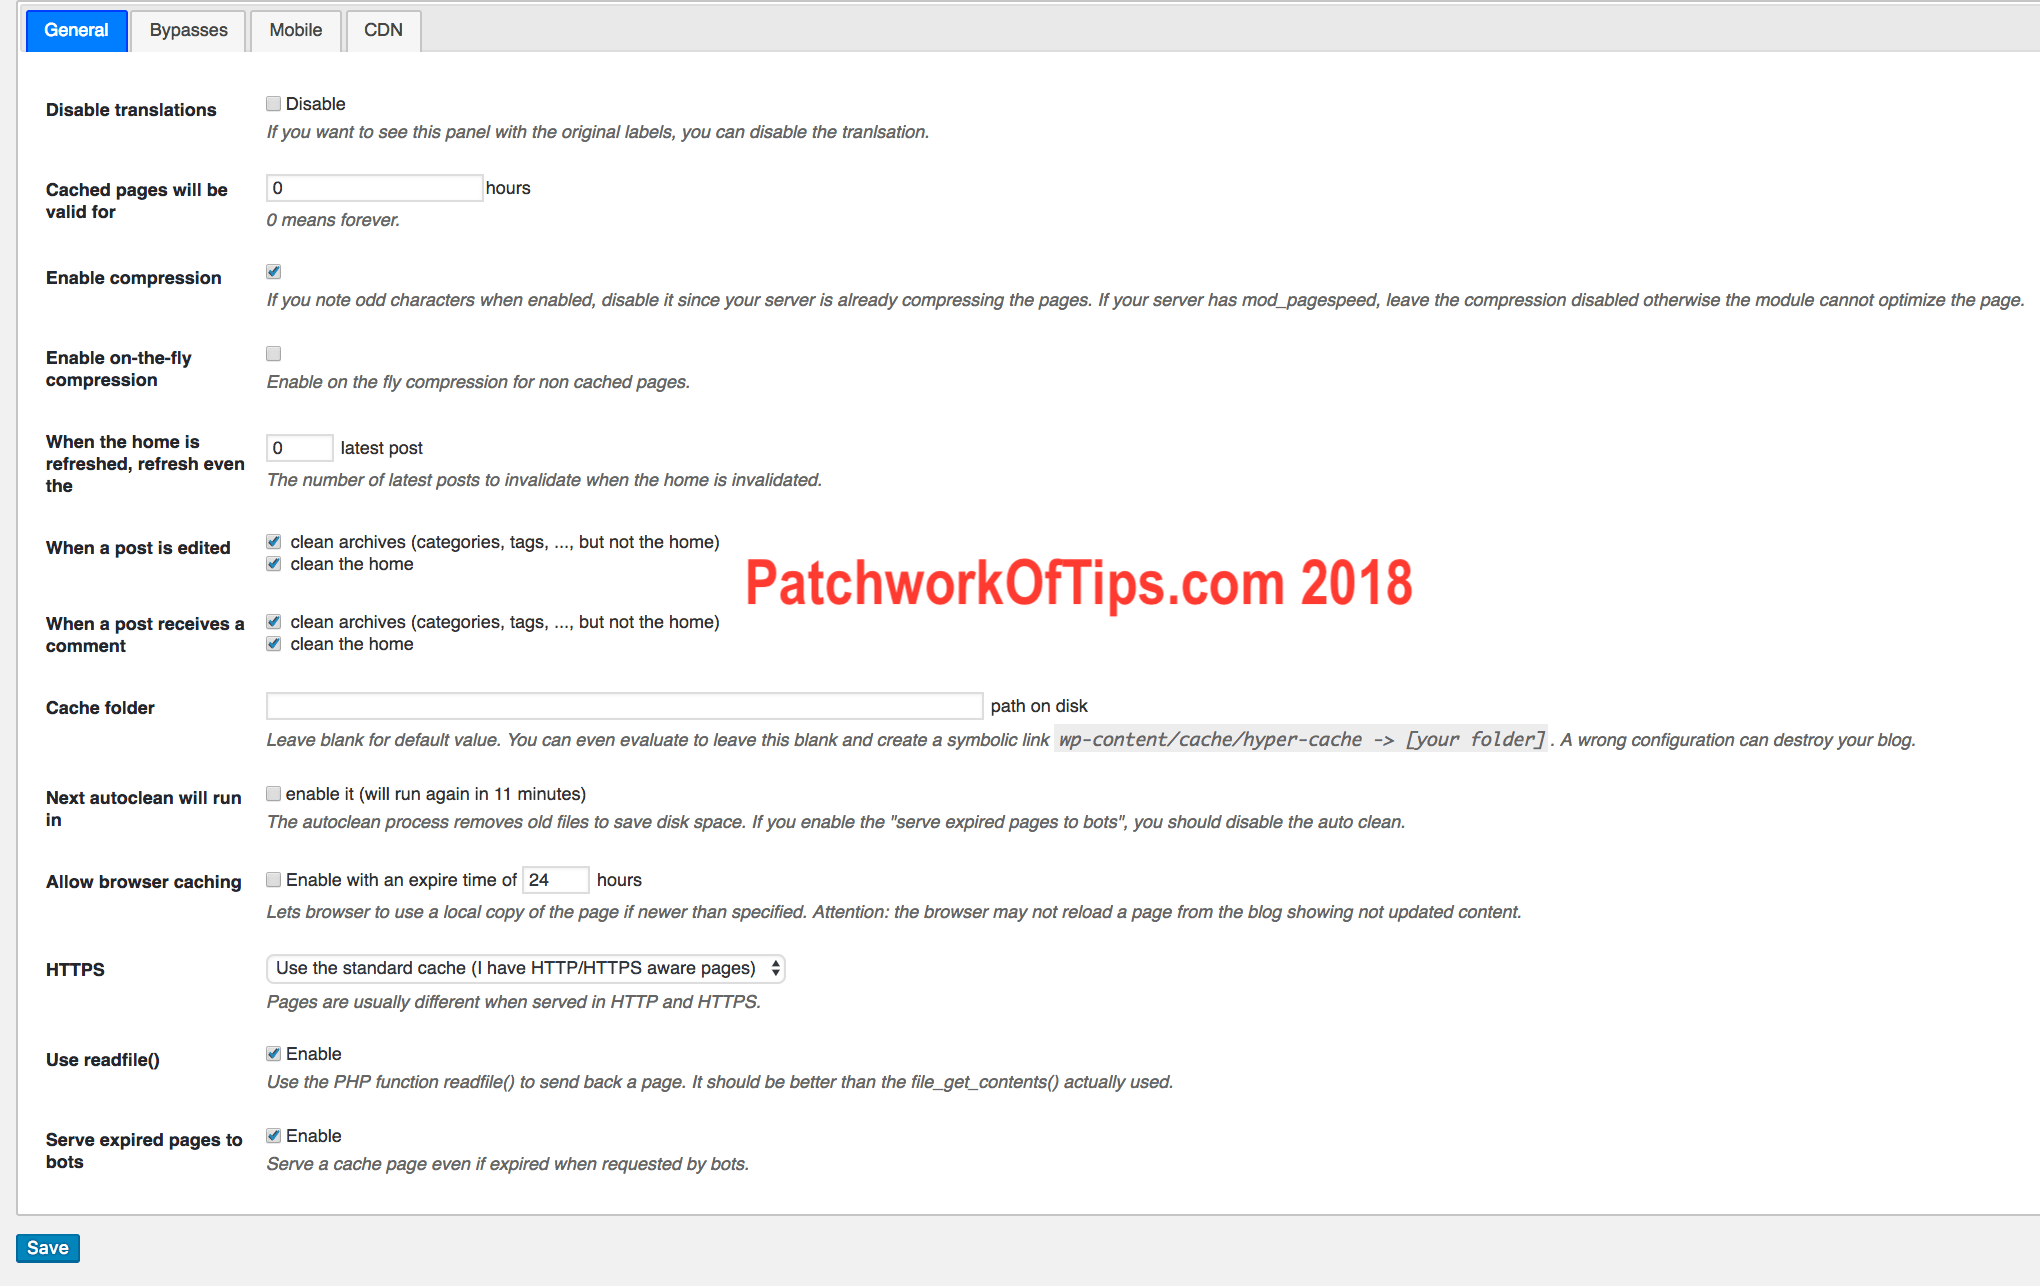
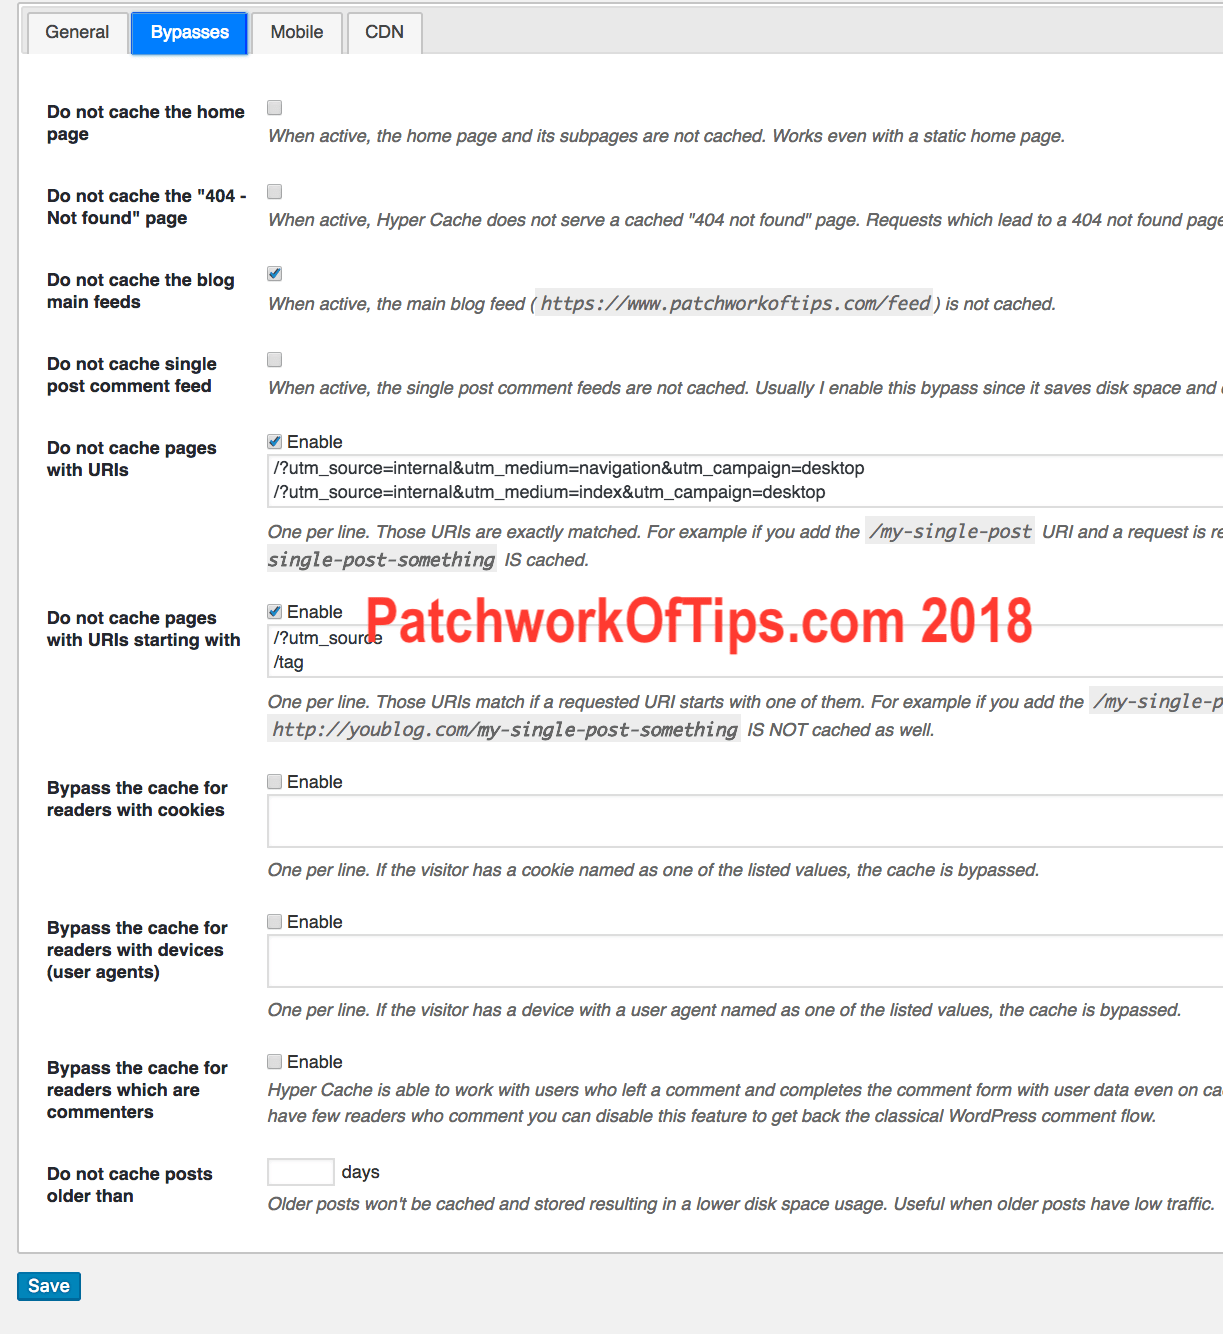
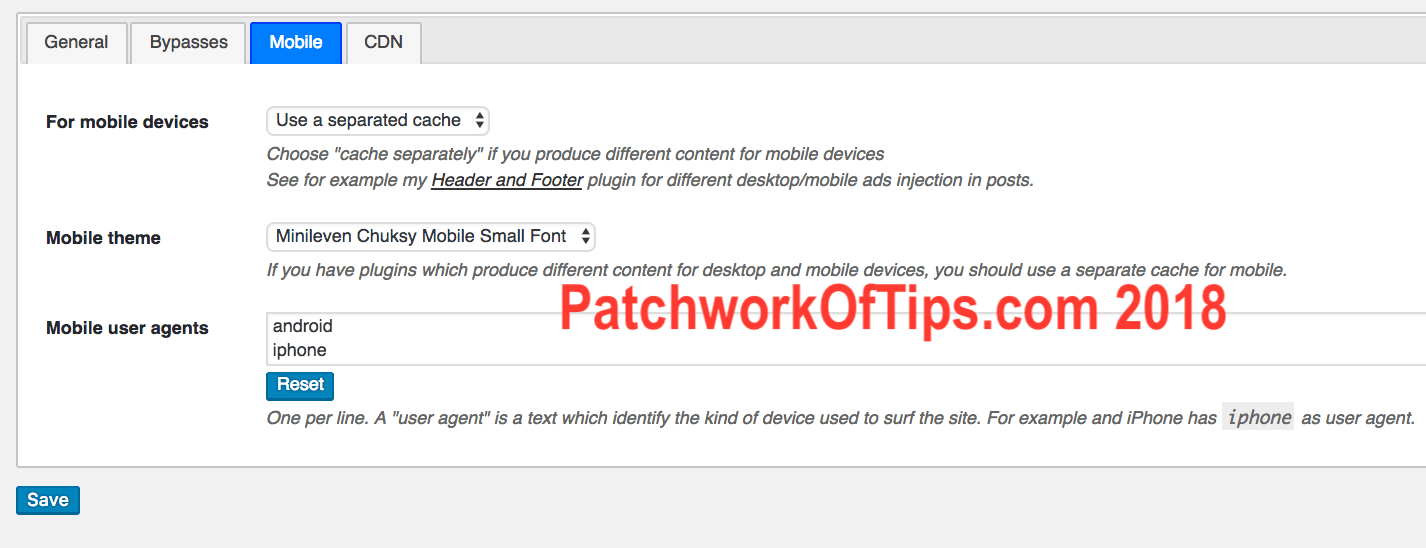
The screenshots below show my exact working setup for the plugin. I’ll try and explain relevant parts in continuation under each screenshot. You can click to enlarge them.
Under General tab, tick Enable Compression. I set Cached pages will be valid for to zero because I want my entire site to work like a static html site with zero unnecessary load on my shared server. If you set it to 100 hours for example, your cached pages will be eligible for automatic deleting after 100 hours. This deleting of cached files will only happen if you enable Next autoclean will run in.
HTTPS is set to Use the standard cache because I enforced HTTPS on my site meaning all HTTP requests for my site are automatically redirected to HTTPS. I don’t have my site loading HTTP and HTTPS at the same time (if you do, Build a separated cache should be your best option).
Under Bypasses tab, I chose to exclude all links on my site which have GET parameters/variables from being cached; (see enabled sections Do not cache pages with URIs and Do not cache pages with URIs starting with). This is to avoid caching one page several times because of a simple change or presence of a variable. This unnecessary caching of pages with variables could increase the amount of server space used up as well as make you go over your server’s inode limits fast.
Now under the Mobile tab, I selected Use a separated cache because I don’t use a responsive theme. I have one theme for desktop and another one for mobile. Select your preferred mobile theme in the drop down.
If you use a responsive theme, you should be fine by selecting the Use the main cache option.
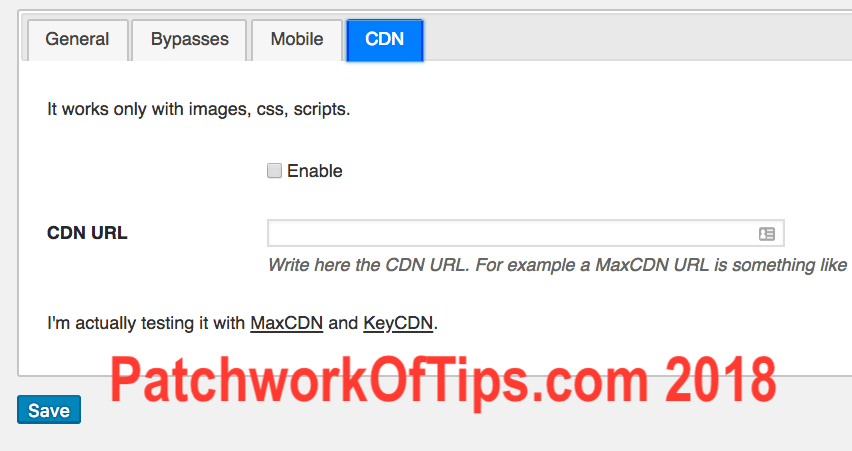
Finally I didn’t touch the CDN tab as I’m using Jetpack’s Photon service to serve my images for now.
That’s all there is to setting Hyper Cache up. Your setting might vary a bit depending on how you want your cache to operate.
Bonus Tip: To make file compression even better, I minify my HTML using a code from this guide: Minify WordPress HTML Via Functions.Php File.
Got issues? Leave a comment and I’ll try to help if I can.
You’ll also like:
Please share this article to help others. Thanks
