So last week on Saturday to be precise, I breached the resource limit on my server again and my sites had to be shut down for over 7 hours. No thanks to W3 Total Cache database caching which I had turned off but had managed to turn itself on again. Thus I made the decision to switch to the simpler WP Super Cache while honoring the Google Page Speed invite I had gotten some days back via the first Google AdSense newsletter for 2013.
This tutorial is for those interested in signing up for the Google Page Speed service but have worries about setting it up on Hostgator Web Hosting.
NOTE: Sorry for the white patches here and there in the images. I blurred out domain names for security reasons. Click on images to view enlarged formats.
Click here to sign up for Google Page Speed service
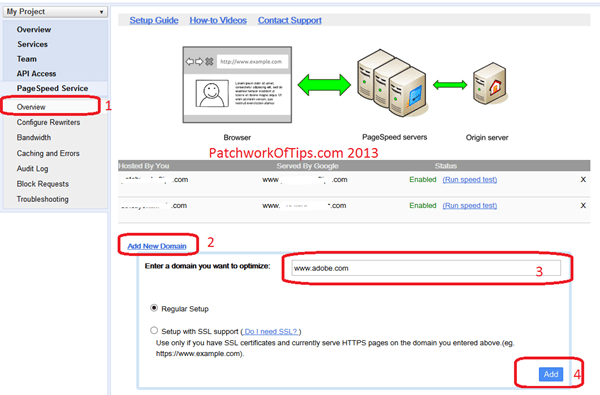
Once you application has been approved, log into your account, hit the Overview panel >> Add New Domain >> Enter your domain name without http as shown in the screen capture below then click on Add
In some cases, you will be asked to verify ownership of the domain name that you’re trying to speed up. The instructions to doing that are pretty simple, so follow them and in less than a minute your site should be verified
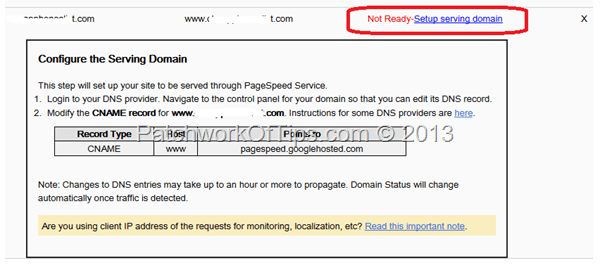
Once verified, your domain would be tagged as Not Ready. Click the Setup serving domain link and a dropdown appears like shown below
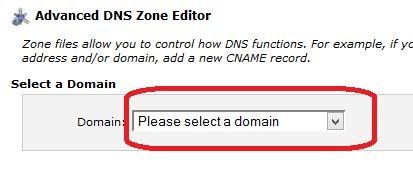
Log into your Hostgator CPanel and make your way to Advanced DNS Zone Editor
If you have multiple domains on your Hostgator account, simply select the one you’re interested in setting up and wait for the page to refresh and load all existing DNS/ Zone file records for that particular domain name
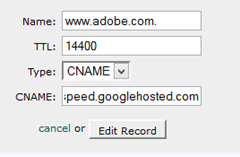
Your interest should be in the NAME entry that starts with www. as marked below
Click the edit link, replace the existing CNAME with pagespeed.googlehosted.com and click Edit Record to save the modification.
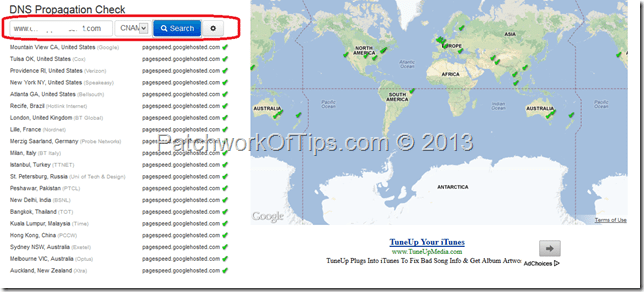
That’s all there is to it. All that’s left to do is wait for DNS propagation to be completed. In my case, it took less than 5 minutes for each site I configured. To check if your domain DNS change has been propagated, go to What’s My DNS? , enter your domain name, select CNAME and hit search.
As shown below, the green ticks mean your DNS change have been successful propagated across the globe on Google servers.
Go back to your Google Page Speed dashboard and refresh the page. The page speed service should by now by enabled on your site and working without a hitch
That’s all folks. How much improvement did you get with Google’s Page Speed service? Feel free to share below.
Personally, I shaved 5 seconds off my loading time bringing it down to 5.1seconds
You’ll also like:
Please share this article to help others. Thanks
