UPDATE 24th November 2013: Check out MyPublicWifi at the end of this post. It’s free and works well too .
A few months back, I introduced you guys to Connectify PRO; an app that let’s you turn your computer into a wireless router using your PC’s wireless card and internet connection. Before I tried that app, I had searched for free alternatives but never found any that worked. Virtual Router Plus which seemed to be the most popular as at then had a bug or so and wasn’t working either until now.
Six days ago, VirtualRouter Plus 2.1.0 was released and it now works flawlessly on Windows 7 and Windows 8 PRO. In fact I had to uninstall Connectify PRO to make sure it didn’t influence anything and it still worked like a charm.
Setting up VirtualRouter Plus 2.1.0 is pretty easy
How To Setup VirtualRouter Plus 2.1.0
NOTE: My PC is running Windows 8 PRO
Connect your PC to the internet.
Click here to download VirtualRouter Plus 2.1.0
Extract VirtualRouter Plus 2.1.0 to a location of your choice
Open the folder and run VirtualRouterPlus.exe
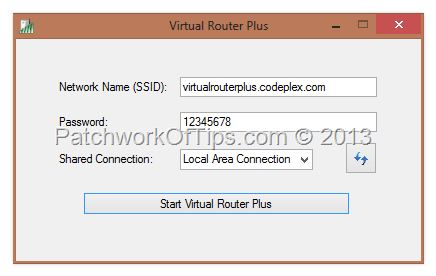
You can leave the settings as default or change the Network Name (SSID) and Password to suit your taste. Since I’m connected to the internet via my USB modem, the only option available under Shared Connection is Local Area Connection so I left it as it is. Shared connection should be set to the internet connection on your PC which you’d like to share.
Hit Start Virtual Router Plus button and wait for your Wi-Fi hotspot to resume services
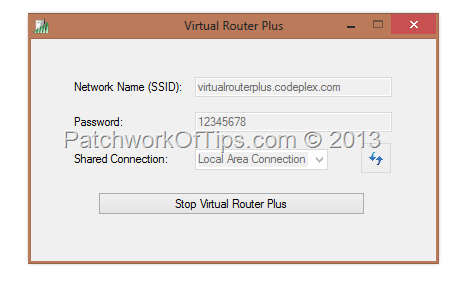
Once the hotspot has been created, the window should appear as shown below with a green wireless icon in the task bar
Feel free to connect your wireless devices to the new created hotspot and browse away.
On my end, I was able to connect my BlackBerry Playbook, THL W6 and BlackBerry Bold 9900 to the hotspot at the same time
How To Setup MyPublicWiFi
For those of you having issues with Virtual Router Plus, you can also give MyPublicWiFi a trial. Works for me and setup is pretty easy
Download and install MyPublicWifi
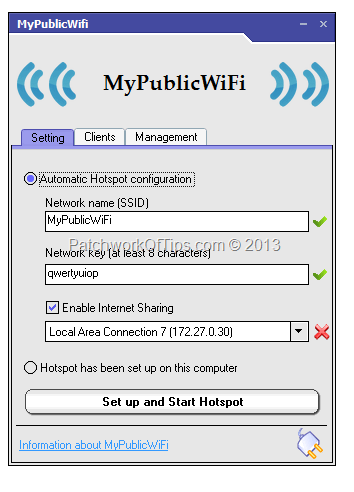
Click on Automatic Hotspot Configuration and then set your preferred Network Name, Network key (password), tick Enable Internet Sharing and beneath it select the internet connection you wish to share as a mobile hotspot.
After that click on Set up and Start Hotspot and enjoy your personal Wi-Fi hotspot
Please make sure to spread the word by hitting the Facebook share and Tweet buttons. Thanks
You’ll also like:
Please share this article to help others. Thanks


