XOS Chameleon v2.0.0 based on Android Marshmallow 6.0 is finally out for the Infinix Zero 3 and I love it mainly cause it has markedly improved the performance of my device. I decided to flash the update instead of waiting for an OTA update as I wanted a clean slate. So far so good, I haven’t noticed any major bug. The only thing I’m not a fan of is the dark notification drawer as it makes some notifications illegible and there seems to be no way to change it to a white background (or maybe I haven’t seen that feature yet on my device)
Flashing the Infinix Zero 3 is pretty straight forward. The initial boot after flashing takes like 3 – 5 minutes thereabout after which you run setup as you would if you were setting up a new smartphone. I highly recommend you back up all of your data even those on SD card before you proceed to avoid data loss.
The guide below is on my experience flashing the Infinix Zero 3 but it’s valid for the Infinix Hot Note 2 LTE. The only thing that varies is the ROM.
Table of Contents
STEP 1
Download and extract SP_Driver_v2.0 and SP_Flash_Tool.
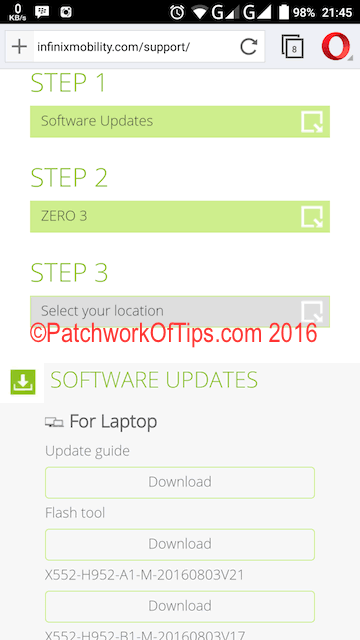
Go to Infinix Support page to download the specific ROM for your device. Select Software Updates in Step 1. Select your phone model in Step 2 and the ROM will be displayed in Step 3. Download the ROM under For Laptop.
To know if your phone is A1 or B1, go to Settings >> About Phone >>Build Number. It will be indicated there. If you’re confused, leave a comment with your build number and I’ll tell you which ROM to flash.
STEP 2
You need to disable driver signature enforcement in Windows 8/8.1 and Windows 10 so that you can successfully install the drivers.
Go to PC Settings from the start menu >> Update and Recovery >> Recovery.
Under Advanced Startup, click on Restart Now.
Your PC will do a kind of reboot and go to a blue Choose an option screen. Click on Troubleshoot (refresh or reset your PC or use advanced tools) >> Advanced Options >> Startup Settings (change windows startup behaviour) >> Restart.
Your PC will now restart and go to yet another blue screen with 10 options. Press 7 or F7 on your keyboard to select Disable driver signature enforcement.
Your PC will then reboot with driver signature enforcement disabled.
STEP 3
Extract the files you downloaded previously and run DriverInstall.exe which is in the SP Driver 2.0 folder.
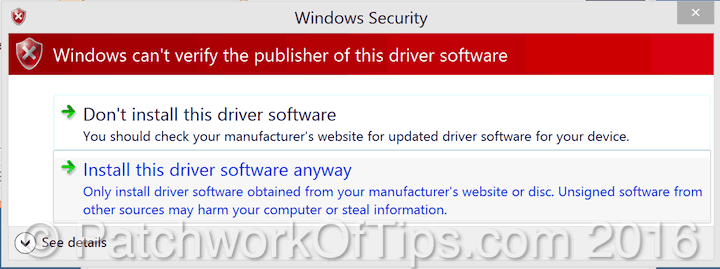
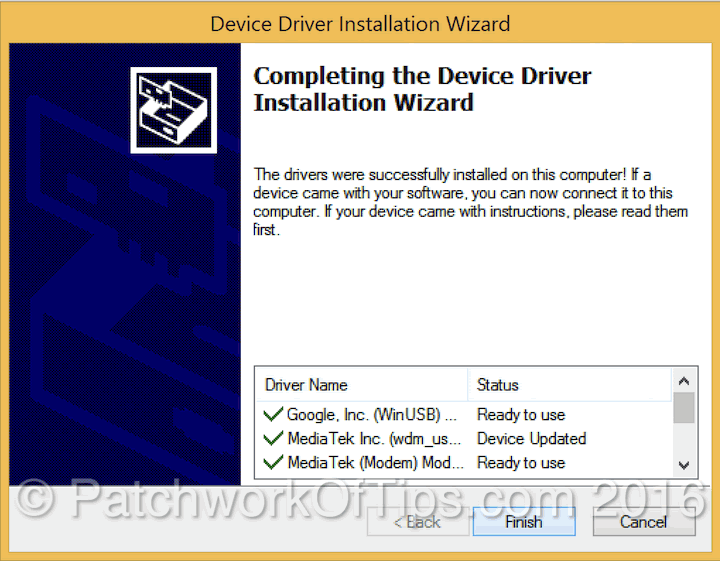
During the driver installation process, you will get several prompts like the one below. Simply click on Install this driver software anyway each time.
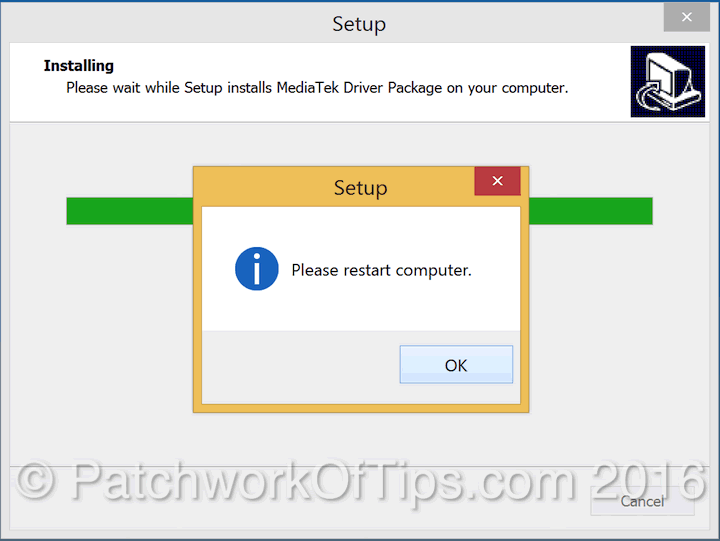
Once driver installation is complete, restart your computer.
Step 4
Please make sure you’ve backed up your data completely. Data stored on the SD card isn’t touched but you never can be too sure, so it’s best you back up to your computer or a USB flash drive.
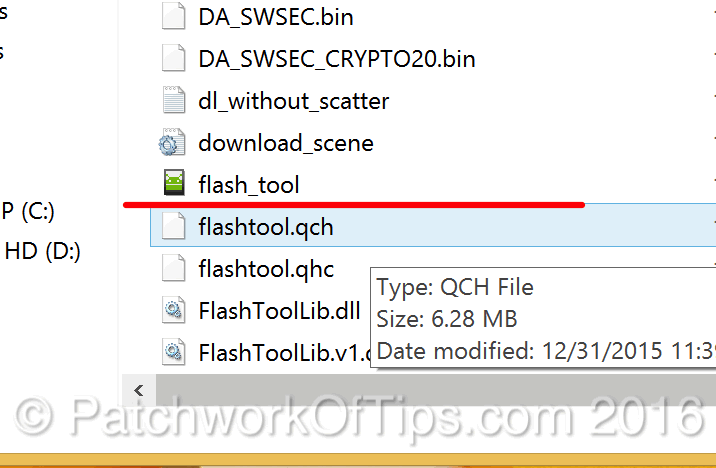
Go to the SP Flash Tool folder and run flash_tool.exe
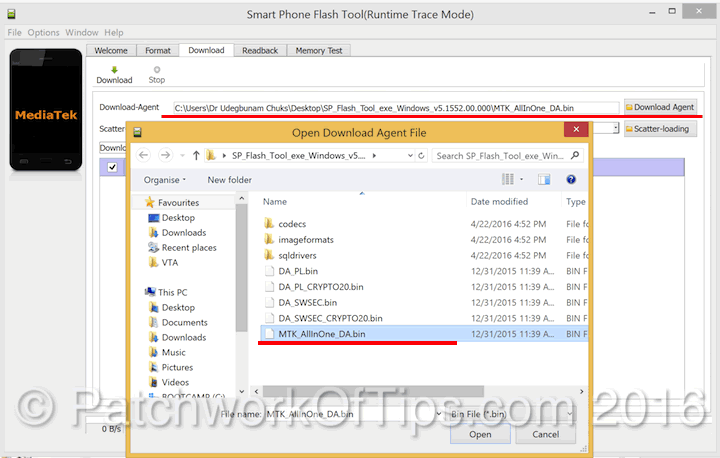
Click on Download Agent and select MTK_AllInOne_DA.bin which you’ll find inside the SP Flash Tool folder.
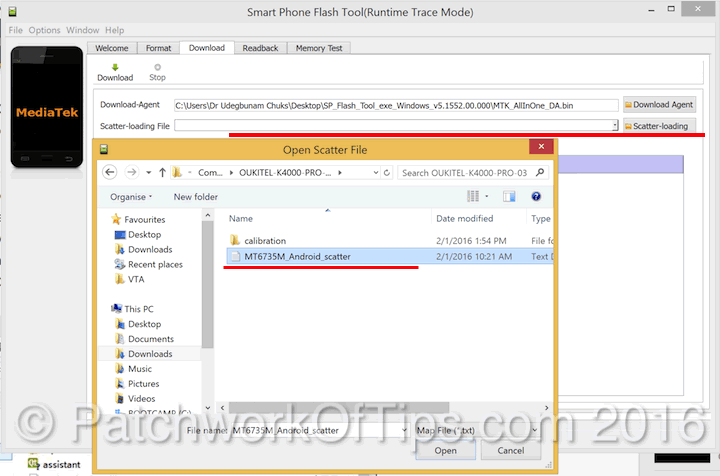
Click on Scatter-loading and select the scatter file for your ROM. For the Infinix Zero 3 it is MT6795_Android_scatter.txt. This file will be in the folder where you extracted your ROM to.
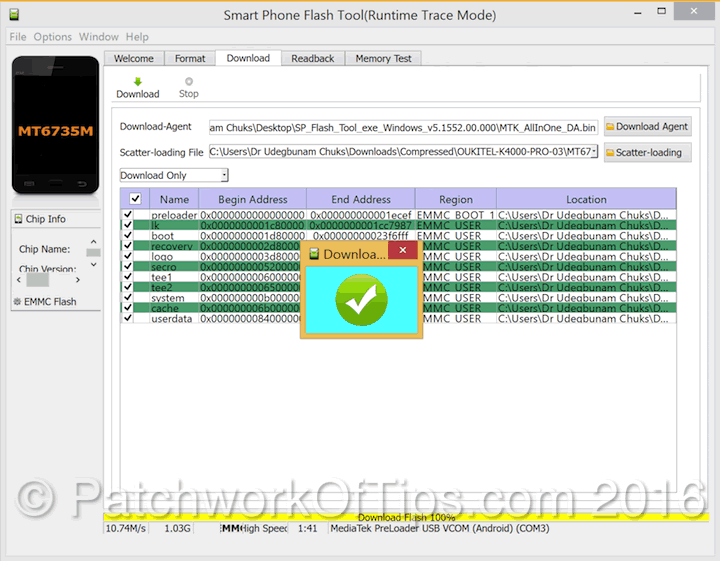
Click on the download button just beside the stop button (sorry I forgot to mark it). Switch your phone off and connect it to your computer.
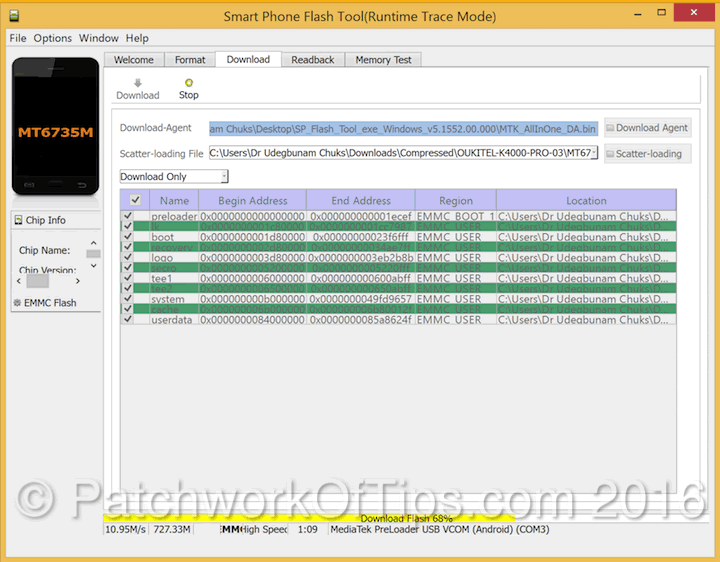
If all goes well, you will see a yellow progress line that says Download flash … at the bottom as shown below. Set your phone down and touch nothing until the process is complete.
NOTE: I had to switch USB ports several times before the damn thing started flashing. You might be lucky and not face that ish at all.
Once the flashing process is complete, simply disconnect your phone and start it.
Please, please, please, if this guide works for you, do leave a comment to let me know. Thanks.
You’ll also like:
Please share this article to help others. Thanks
