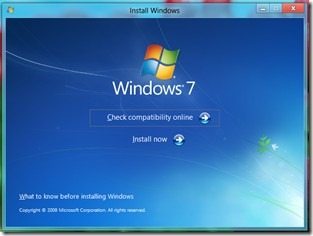
Three days ago, I decided to re-install Windows 7 and run it along side Windows 8. Unfortunately that wasn’t possible as Windows 7 had to be the first OS installed before Windows 8 so that the dual-booting thingy could work.
I proceeded to seek out my Dell recovery disks and a few minutes later, i got the rudest shocker.
ERROR 0x4001100200000100A
This error message made recovering my system impossible and after some intense Google search and communication with the Dell team on twitter, it dawned on me that there was no visible solution for this error.
Thus I made up my mind to just get a Windows 7 DVD and wipe-format-reinstall my OS partition.
NOTE: Unlike my past tutorials, there will be no images/screenshots. It took me over 4 hours of literally tearing my hair out to fix this and creating screenshots was the last thing on my mind most especially when I *bricked* the computer and experienced the BOOTMGR is missing. Press Ctrl+Alt+Del to restart error.
Do not follow this tutorial if you’re not willing to take the risk of losing your data or making your computer useless and if you don’t know how to follow text only based instructions.
You’ve been warned. This ain’t for non-geeky fellas.
Let’s proceed.
Table of Contents
STEP 1
Backup every single important data on your laptop, even if you have a separate partition for your files etc. Sh*t happens and that partition could be affected.
STEP 2
Look underneath your laptop at the Windows tag and take note of what version of Windows your laptop came with from the factory.
Browse through the list of Windows 7 ISOs available at Download Windows 7 ISO (Official 32-bit and 64-bit Direct Download Links) and download the appropriate one for your system. (Take note of the language version)
Once you’re done downloading, burn the ISO to a 4GB DVD. I made use of IMG-Burn but ran into issues later on thus I had to call on my colleague yet again who borrowed me her Windows 7 system and I burnt the ISO using the default Windows Disk Image Burner app with the Verify option ticked.
STEP 3
Find out how to access your computer’s BIOS and make sure it’s set to allow booting from CD/DVD drive first before the hard drive
STEP 4
Insert the Windows 7 DVD into the DVD drive and restart your system, pay attention for when you’d be asked to press any key to boot from DVD. Do so.
Once the installation interface comes up, proceed carefully until you come to the Which type of installation do you want? screen
Select Custom
On the next screen, choose where you would like to install Windows 7. (Personally I took the chance to also delete the 16GB recovery partition as it’s practically useless now. I later allocated the space to my data storage partition)
Once you’ve selected your desired partition for Windows 7 hit next and soon installation should begin
STEP 5
Once the installation of Windows 7 is complete, use your partition manager to create a partition for your Windows 8 installation. Nothing less than 50GB is highly recommended. Personally I make use of EASEUS Partition Master 9.1.0 Home Edition for all my partitioning tasks.
Once you’ve created your partition for Windows 8, insert your Windows 8 PRO DVD into your computer and restart. Make sure you have your Windows 8 product key copied on a piece of paper ‘cause you’ll be needing it.
Follow the prompts like you did in previous steps to install Windows 7 and make use of the Custom Install option so that your installation lands on the partition created solely for Windows 8
Sit back, relax and wait for the installation to complete.
That’s all there is to it guys. You’ve now succeeded in dual booting Windows 7 and Windows 8
P.S: You have to activate your Windows 7 installation using the product key on the Windows tag beneath your computer. Also for Dell users with Windows 7, simply make use of the Driver and Utilities disc that shipped with your laptop to reinstall dem drivers. For your Windows 8 partition, you’d have to access the drivers online from the Support and Download section of your PC manufacturer’s official site.
Comments and questions are welcome but do please note that I ain’t a computer technician so I wouldn’t have answers to all your questions
You’ll also like:
Please share this article to help others. Thanks
