Christmas 2015 had me in the mood for a present for myself as I’d had it with Xiaomi’s MIUI which can lag for all of Africa on the MiPad. I decided to get a new tablet running something close to vanilla android but the prices were just exorbitant compared to the $250 I paid for the 64GB MiPad. NVIDIA’s Shield Tablet K1 seemed like a worthy candidate at $199 but the battery life reviews were a huge let down. The same battery life killed the $300 Asus Zenpad S 8
Eventually I gave up and started testing out custom ROM options. Of the lot I tested, the smoothest was BDITA ROM For Xiaomi Mi Pad which is an unofficial Cyanogenmod 11 ROM based on Android KitKat. As expected it had the best user feedback too.
The ROM is smoother than MIUI 7 in my opinion though I still get that initial lag I’m used to in MIUI when I turn on WiFi and the device has to poll all emails, alerts. tweets etc. Once that’s completed it’s smooth sailing onwards with the occasional hangups.
My best feature on the ROM is the Hover notification that allows me attend to notifications without closing the main app I was working on. Just tap on a floating notification and the appropriate app will open in a small window. Once you’re done attending to the notification, you tap outside the pop up window right back to what you were doing before the notification came in.
Pretty sweeeeet!
How To Install BDITA’s Cyanogenod 11 ROM For Xiaomi MiPad
NOTE: Backup every personal file to an external location as this process is expected to wipe the entire device (though in my experience it left all my personal data on internal and external storage partitions intact). To revert to MIUI 7 if you don’t like the ROM, you will have to flash your MiPad via Fastboot mode. See How To Flash Xiaomi MiPad In Fastboot Mode.
Installing/Updating the ROM is a bit tedious as there are no OTA updates. So far 5 updates have been released since I installed the ROM.
Step 1
Click here to download ClockworkMod (CWM) recovery 6.0.5.0 for Xiaomi MiPad. Also download the BDITA ROM For Xiaomi Mi Pad, Google GAPPS and MIUI 7 China Developer ROM
NOTE: The latest update/version of the ROM can be accessed here.
Step 2
Transfer CWM, BDITA ROM, GAPPS and MIUI 7 Developer ROM to your MiPad’s microSD card then go to Updater >>> Choose update package and select the CWM file. It will install CWM Recovery and do a reboot when it’s done. Once done, go back to the Updater app >>> Reboot to Recovery mode
Step 3
Once in recovery mode, select System 1 >> Wipe data/factory reset then go to Advanced >>> Wipe Dalvik Cache then go back to main menu
In the menu, go to Managed System (System1) and switch to System2. Wipe data/factory reset then go to Advanced >>> Wipe Dalvik Cache then go back to main menu
Step 4
This step is necessary to fix a bug that limits RAM to just 1745MB.
Go to Install Zip >>> Choose zip from /storage/sdcard1. Select MIUI 7 ROM and the installation will begin. It shouldn’t take more than 2 -3 minutes.
When done, go back to the main menu, select Managed System (System2) and switch to System1. Repeat the MIUI 7 installation again
Step 5
Reboot your MiPad and once it has completely booted to the desktop go to the Updater app >>> Reboot to Recovery mode.
Step 6
Repeat Step 3
Step 7
Go to Install Zip >>> Choose zip from /storage/sdcard1. Select BDITA ROM and the installation will begin. It shouldn’t take more than 2 -3 minutes. Once done, go back and repeat the same process for the GAPPS file.
When done, go back to the main menu, select Managed System (System2) and switch to System1. Repeat the BDITA ROM and GAPPS installation again
Step 8
Reboot and run setup and you’re done.
How To Update BDITA’s Cyanogenod 11 ROM For Xiaomi MiPad
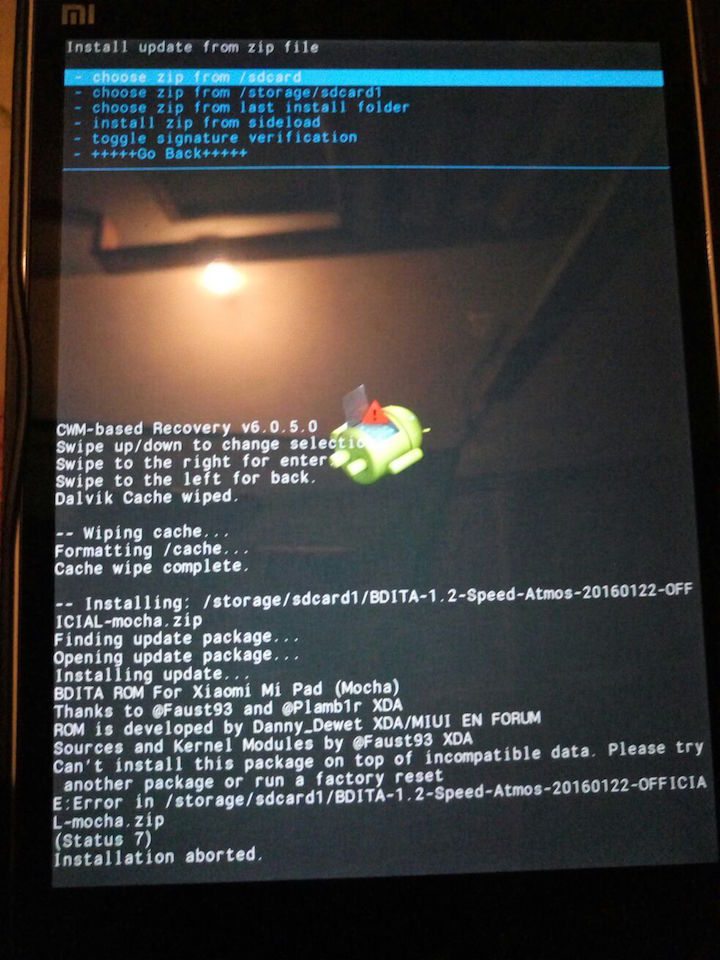
With regards to future updates, there’s no OTA update and flashing the update over the current installation won’t work. I tried wiping cache partition and dalvik cache then flashing the update and it failed. See snapshot below
To update to the latest version of BDITA ROM, you simply need to download the latest version of the ROM, boot into recovery mode, create a backup of your system on external SD card preferably then repeat Step 3 and Step 7. You only need to backup the data in the active system.
Reboot the device and complete setup.
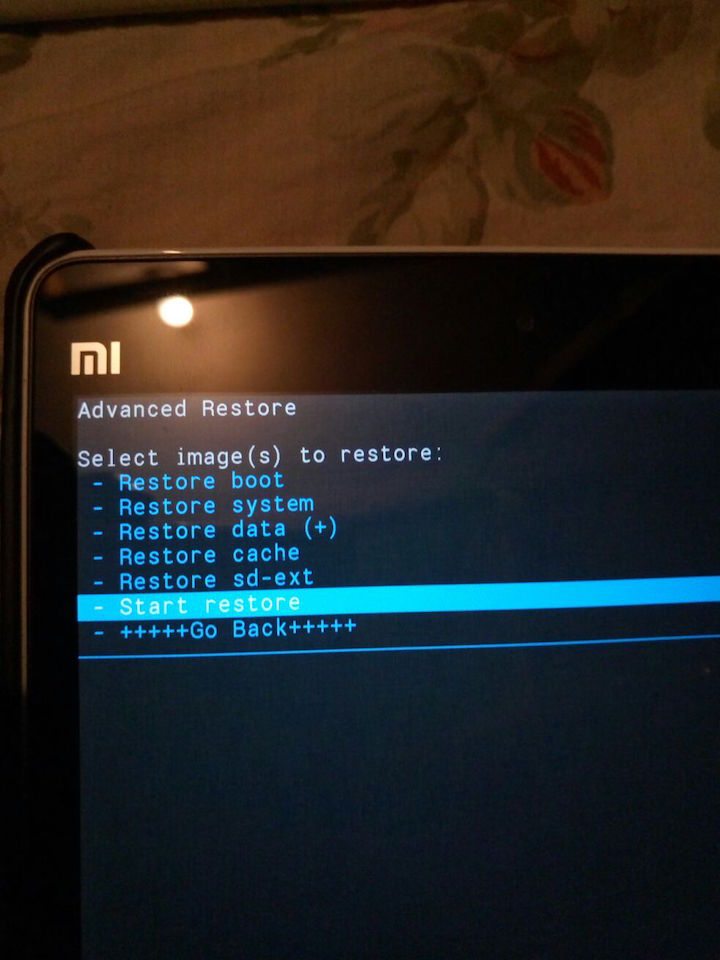
Reboot into recovery mode, wipe cache partition and dalvik cache then advance restore just the data from your backup. See snapshot below. Repeat this for both system 1 and 2.
If you’ve got questions be sure to leave a comment.
You’ll also like:
Please share this article to help others. Thanks


