One of the apps I miss considerably on my MacBook Pro is Dell’s Battery Meter Application. Once activated, it automatically helps to switch power profiles in Windows to either Power Saver or High Performance thereby saving you the time wasted adjusting stuff like screen brightness and CPU speed whenever you’re plugged into a wall socket or not.
PowerPlan 7 promises to do this switching for Windows and Mac OS as well as storing your default keyboard back lighting settings but unfortunately the latest version triggered Norton Internet Security so I couldn’t test it out. Thus I went for the much simpler and also free Power Scheme Switcher V 1.0.8
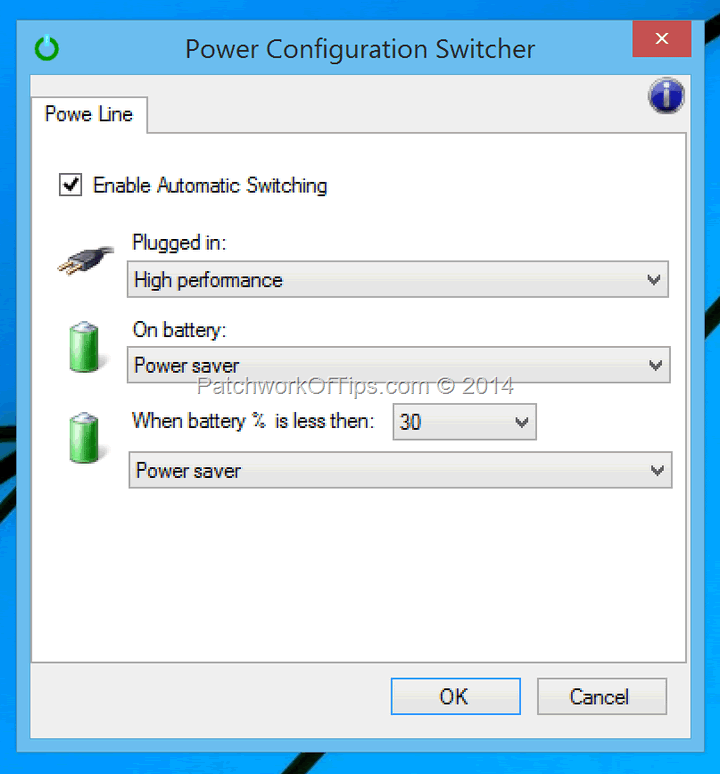
Power Scheme Switcher is pretty simple when it comes to setup. Simply configure as shown below or how you wish to and hit the Ok button and it starts working immediately.
UPDATE 19/02/2003: Download the software directly from Softpedia. Works on Windows 10 and Windows 11
Do make sure that the app is not blocked from starting automatically when the computer is booting as that would defeat the purpose. Also in the configuration area, make sure you set something for Plugged in, On battery and When battery % is less than. Failure to do so causes the app to shut down or show an error message.
For some reason, the app needs all fields configured if you wish to enable the automatic switching of power plans.
So far so good, the app hasn’t given me any issues and is such a battery saver.
You’ll also like:
Please share this article to help others. Thanks
