UPDATE 22 October 2014: This tutorial also works for installing the MediaTek Preloader USB VCOM Driver on Windows 10 (Technical Preview)
UPDATE 27 April 2016: If this guide doesn’t work for you as it’s tailored to old mediatek processors like the MT6589, check out this one out which covers recent processors like the MT6735M.
Are you having issues flashing your MediaTek device with SP Flash Tool in Windows 8/8.1? Do you find it difficult to install MediaTek PreLoader USB VCOM Port in Windows 8? Well this post might just solve your problem like it did mine.
One of my major fears about dumping Windows 7 for good was that I couldn’t flash my MediaTek devices (Lenovo P780 et Yoga 8) at all with Windows 8. SP Flash Tool was just not responding at all in Windows 8.1 despite trying this.
After so much googling, I finally came across a solution that worked flawlessly well.
I just successfully flashed my Lenovo Yoga 8 on Windows 8.1 Pro on my Retina MacBook Pro with Bootcamp 5.0 using SP Flash Tool without fuss.
First things first! We need to disable driver signature enforcement as the driver for MediaTek isn’t signed and thus will not install just like that. My first trial at installing the MediaTek Preloader USB VCOM driver was futile cause of driver signature verification issues.
How To Disable Driver Signature Enforcement In Windows 8/8.1 and Windows 10
Go to PC Settings from the start menu >> Update and Recovery >> Recovery.
Under Advanced Startup, click on Restart Now.
Your PC will do a kind of reboot and go to a blue Choose an option screen. Click on Troubleshoot (refresh or reset your PC or use advanced tools) >> Advanced Options >> Startup Settings (change windows startup behaviour) >> Restart.
Your PC will now restart and go to yet another blue screen with 10 options. Press 7 or F7 on your keyboard to select Disable driver signature enforcement.
Your computer will auto restart again and then you can now proceed with the installation of Mediatek’s Preloader USB VCOM driver for Windows 7/8/8.1/10.
How To Install SP Flash Tool / Mediatek Preloader USB VCOM Driver For Windows 8/8.1 and Windows 10
Download and extract MediaTek USB VCOM Drivers For Windows 8, Windows 8.1 and Windows 10
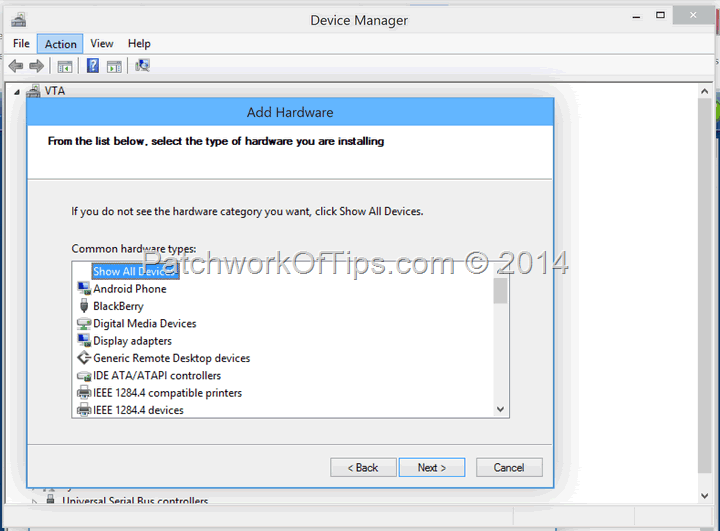
Go to Device Manager >> Action >> Add Legacy Hardware as shown below
Select Install the hardware that I manually select from a list and click Next
Select Show All Devices and hit Next
In the next screen, click on Have Disk in the bottom right corner and then navigate to the drivers you extracted to your computer. The drivers you need are located in the Windows 7 folder. For x64 PC choose usb2ser_Win764.inf and for x86 PC make use of usb2ser_Win7.inf then click OK
Once the driver loads, select MediaTek Preloader USB VCOM Port in the next screen and click on next.
An error in red that says Windows can’t verify the publisher of this driver software will pop up. Select Install this driver anyway and the installation of the MediaTek Preloader driver will start.
Now you can proceed to flashing your MTK based Android phone with ease using SP Flash Tool.
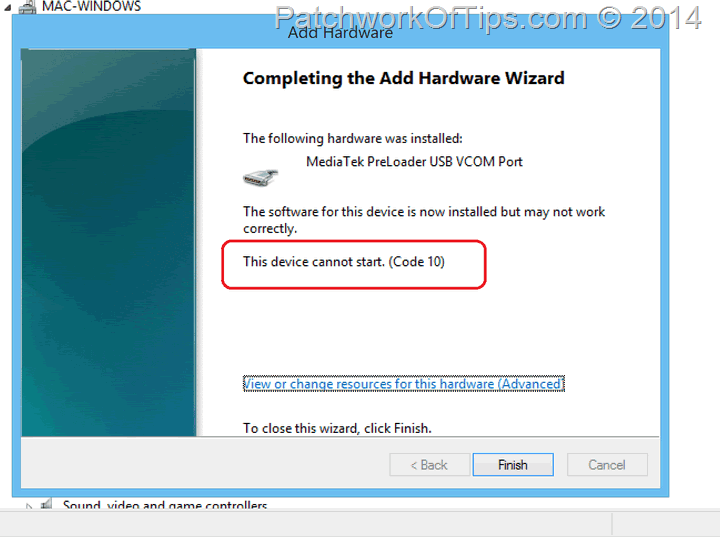
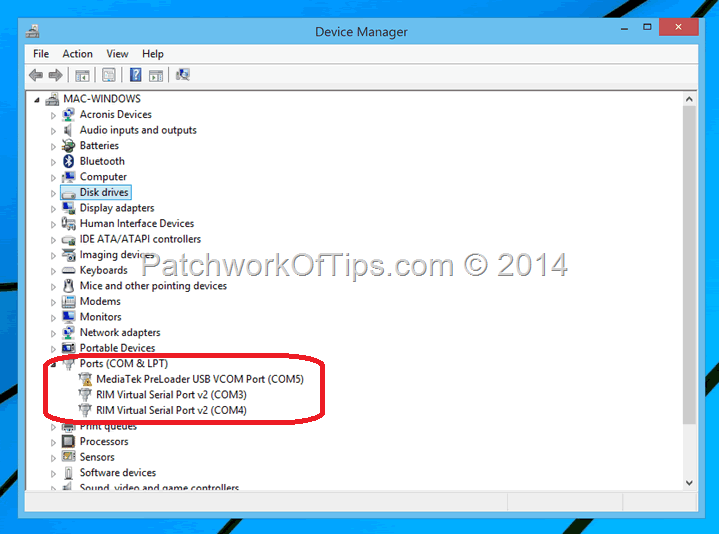
After successful installation, I got the error – This device cannot start. (Code 10) as circled in the image above and there was a yellow triangle beside the MediaTek driver under Device Manager as shown below.
I simply ignored them as suggested by someone and ran SP Flash Tool which finally worked.
So guys, just give it a try and if it works for you too, please please leave feedback below. If it doesn’t work, do please make sure you followed the instructions properly.
Finally I can now detach myself from my Dell Inspiron N411Z and focus on my Apple 13″ Retina MacBook Pro. Good times. lol
Have a great day guys and don’t forget… I need your feedback and shares too. Thanks :)
You’ll also like:
Please share this article to help others. Thanks


